28 Februari 2010

Animation Basics

In Flash animation can be done in four basic ways:

It is very simple and neatly explained below.

A. Creating Motion Tween in Flash
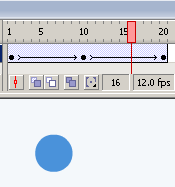
  1. Draw a vector using any of the drawing tools in Flash, say a small circle and convert it into a symbol (F8) by selecting the Graphic option and name the symbol say 'ball'.
  2. Click the 20th frame in the Timeline and insert a frame (F5).
  3. Now right-click the 20th frame in the Timeline and select Create Motion Tween (or Motion option from the Tween panel of the Properties inspector) and insert a Key Frame (F6).
  4. Select the 10th frame and insert a Key frame (F6) and move the ball to a different position say, above the current position to create a motion sequence (automatically tweened by Flash).
  5. Save your work and test the Movie (Ctrl + Enter). That's it you have created simple animation using Motion Tween.


Fig: Timeline of Motion Tween

Note: Use the Color Panel of the Properties inspector to reduce the Alpha value from 100 to 32 for the 1st and last frames to produce Simple Alpha Tweening as shown in the Example.

B. Creating Shape Tween in Flash

  1. You can create Shape Tweened animations using Shape option from the Tween panel of the Properties inspector. Draw a vector using any of the drawing tools in Flash, say a small circle and remove its border.
  2. Click the 10th frame in the Timeline and insert a Key Frame (F6). Now draw another shape say a diamond using the rectangle tool without a border.
  3. Now right-click on any frame in between these two Key Frames and select Shape option from the Tween panel of the Properties inspector.
  4. Save your work and test the Movie (Ctrl + Enter). That's it you have learnt how to create Shape Tween in Flash.


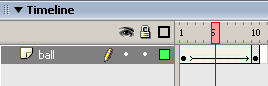
Fig: Timeline of Shape Tween
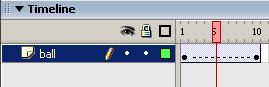
Note: Only vectors can be Shape Tweened (Not for Symbols). Note both the Tweens have different colors along the Timeline as shown above. Make sure that the line is smooth without being broken to ensure correct Tweening.


Fig: Timeline of Broken Tween

C. Frame-by-Frame Animation

  1. Create a vector/plain text using any of the drawing tools in Flash, say a text with 'Animation' typed as shown in the example and break it using Break Apart (Ctrl + B) to separate the alphabets as shown below:

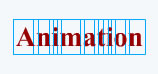
  2. Fig: Showing Text after Break Apart

  3. In Frame-by-Frame animation we create the object for each frame so as to produce an animation sequence.
  4. Insert Keyframe (F6) and move the alphabets so as to produce an animation sequence.
  5. Repeat the above step as far as desired to create Frame-by-Frame animation as shown in the example.
  6. Save your work and test the Movie (Ctrl + Enter). That's it you have created an animation using Frame-by-Frame animation.


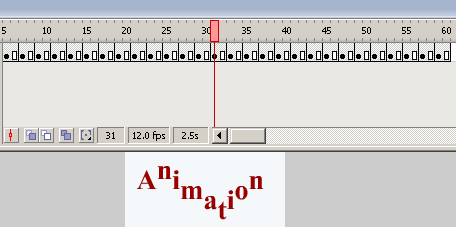
Fig: Timeline of Frame-by-Frame Animation

D. Creating a Guided Motion Tween in Flash

  1. Create a vector/plain text using any of the drawing tools in Flash, say a text with 'Flash' typed and break it using Break Apart (Ctrl + B) as done in the previous example and put each alphabet in different layers and name the layers as shown in the picture below.
  2. Insert a guide layer by right-clicking the topmost layer and select 'Add Guide Layer' (Insert-->Timeline-->Motion Guide), draw any path using the pencil tool in the guide layer as shown in the example.
  3. Now create Motion tween by selecting the object in the 1st frame and snapping its registration point to one end of the path.
  4. Snap the object in the last frame to the other end of the path in the guide layer.
  5. Repeat the same for all the objects (alphabets) by snapping their registration points to the path in the guide layer.
  6. Save your work and test the Movie (Ctrl + Enter). That's it you have learnt how to create motion along a guided path.


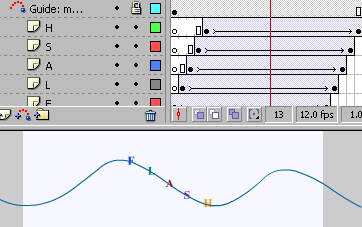
Fig: Timeline of Guided Motion Tween

by : http://www.smartwebby.com/

Related Posts by Categories


0 komentar: