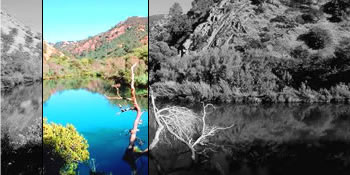
Please carry out the following steps in Flash to create the photo masking effects.
Simple Photo Masking
- Import (Ctrl + R) any color photo to be masked and its black & white version onto the stage.
- Now add a new Layer and move the Color picture into it. Make sure both pictures are perfectly on top of each other.
- Add a new Layer above the color picture layer and name it as 'Image Mask'.
- Draw any vector, say a rectangle with a height more than the picture height and width say 100. Convert the vector to a graphic symbol (select and press F8).
- Right-click the Layer named 'Image Mask' and select Mask from the pop-up menu. This command will make the current 'Image Mask' layer to mask the layer below it (containing the color photo), resulting in the color photo being shown only the area specified by the mask layer.
- Save your work and test the Movie (Ctrl + Enter). The movie will look similar to our example above. That's it you have learnt simple photo masking.
Motion Photo Masking
- Advanced effects can be created by using Motion Tweened animation as a mask on an object in Flash.
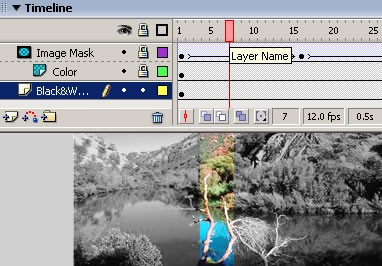
- In the above example Create Motion Tween for the rectangle graphic and make the mask slide up and down, the timeline is shown below:
 Fig: Timeline of Advanced Mask
- Save your work and test the Movie (Ctrl + Enter). That's it, your cool photo masking advanced effect is ready!
souce : http://www.smartwebby.com/
Related Posts by Categories

 Fig: Timeline of Advanced Mask


 Photo Masking Effects


0 komentar:
Posting Komentar